How to Sell Baked Goods on Instagram

You bring a lemon drizzle loaf to a friend's birthday, and before the candles are even out, someone corners you by the kitchen: "Do you take orders?" You laugh, say "maybe," and spend the drive home wondering how people actually sell baked goods on Instagram, because you have the recipes, the oven, and an account full of bakes nobody has ever paid for. The good news is that the gap between that moment and your first paid order is much smaller than it feels, and you can start closing it this week.
Why Instagram Is the Best Place to Start Selling Baked Goods
A website takes weeks to build and nobody visits it until you send them there. Etsy is built for shipping, and most of what you bake would not survive the post. A farmers market means a stall fee, a tent, a table, and a 6am Saturday before you know if anyone wants your cinnamon rolls.
Instagram asks for none of that. The people who already compliment your baking are on it, which means your first customers are a tap away. It costs nothing to set up. And it does two jobs at once: your grid is the shop window, and every post is the advert that brings people to it. When someone sees your bake and wants it, they can message you in the same app, in the same minute.
That is the real reason Instagram works for home bakers. You do not need to build anything before you start. You need a phone, a profile set up to take orders, and something worth ordering. You already have the third one.
Step 1: Make Your Profile Look Like a Real Business
When someone lands on your page after seeing a bake they want, they decide in about three seconds whether you are a person who bakes or a baker they can buy from. Four things make that decision for them.
Your profile photo. Swap the selfie for a clean, close shot of your best bake: the layer cake with the neat crumb coat, or your signature cookie. That tiny circle shows up next to every comment, story, and DM you send. When it is a cake, people read you as a bakery. When it is your face at a wedding, they read you as a friend who bakes.
Your bio. Three lines, three jobs. Say what you bake, say where you are or where you deliver, and say how to order. Something like: "Celebration cakes and cookie boxes, made to order. Pickup in East Austin, delivery within 5 miles. Orders open every Thursday, DM to book." A bio that only says "baking is my happy place" is lovely, but it leaves a ready buyer with no idea what to do next.
Your link in bio. This is the one link Instagram gives you, so make it do the selling. Point it to an order form, a booking link, or at the very least a simple menu with prices. Prices matter more than you think. Many people will not DM to ask "how much?" because it feels awkward, so they quietly leave instead.
Your highlights. You need two to start. One called "Menu" or "Bakes" that shows your most popular items, and one called "How to Order" that walks through how ordering, payment, and pickup work. Highlights answer the same five questions you would otherwise answer in DMs every week, and they answer them at midnight while you sleep.
Step 2: Get Your Photos Looking Professional Before You Post
Once you start selling baked goods on Instagram, your photos stop being memories and start being your shop window. A flat, dim photo of a beautiful cake used to cost you a few likes. Now it costs you the order, because nobody pays $65 for a cake that looks average on their screen. The bar goes up the moment money is involved.
The tricky part is that your kitchen is working against you. Warm overhead bulbs turn white buttercream yellow, the counter behind the cake is full of mixing bowls, and evening light leaves everything soft and muddy. None of that says anything about how good your baking is, but it is all a buyer can see.
This is where Feedtray comes in. You upload the photo you took on your phone, and Feedtray corrects the lighting, cleans up the background, and fixes the color in one click. Your bake ends up looking the way it does in real life, and it is ready to post as a product people want to buy.
If you want to improve the photos you take in the first place, how to take better photos of baked goods for Instagram covers angles, light, and styling in detail.
Step 3: Post Content That Creates Desire and Tells People How to Buy
Most home baker Instagram accounts are full of gorgeous bakes and no way to buy them. The caption says "so proud of this one," the comments say "wow," and nobody orders. When you are selling, every post needs to do two things: make someone want the bake, and tell them exactly how to get it. Three types of post do most of the work. Once your posts are set up to sell, growing the audience that sees them is a separate job, and how to get more bakery customers from Instagram covers that in full.
The product post. This is a single bake, photographed well, with a caption that sells it. It names the flavor, describes what it is like to eat, gives the price, and tells people how to order. Here is the difference.
Weak version:
Chocolate cake available. DM me.
Strong version:
Triple chocolate fudge layer cake. Three layers of dark chocolate sponge, salted caramel between each one, and a whipped ganache that tastes like the inside of a truffle. It is rich enough that a 6-inch cake feeds 10 people, so it is the one to bring when you want the table to go quiet.
6-inch: $55. 8-inch: $75. Add a piped message for $5.
Pickup Friday or Saturday in East Austin. DM me the word FUDGE with your date and size, and I will confirm within 24 hours.
The weak version tells people a cake exists. The strong version makes them taste it, removes the awkward price question, and gives them a one-word way to start the order.
The order window post. If you bake in batches and fulfill on set days, which is the easiest way to start, this post goes up every week. It tells people what is on the menu, when orders close, and when they get their bakes.
Weak version:
Taking orders this week! Let me know if you want anything.
Strong version:
Orders are open for Saturday, November 7.
This week's menu: Brown butter chocolate chip cookies, box of 6: $18 Maple pecan sticky buns, box of 4: $22 Classic sourdough loaf: $12
I bake 15 boxes of each, and orders close Wednesday at 8pm or when they are gone, whichever comes first.
To order: tap the link in my bio, pick your items and a pickup time between 10am and 2pm. Payment confirms your spot.
"Let me know if you want anything" puts all the work on the customer. The strong version gives them a menu, a deadline, a number, and one place to go. People order when ordering is easy and the window has an edge.
The sold out or last few post. Real scarcity is one of the most useful tools you have, because it is true. You can only bake so much in one kitchen. Saying so is not pushy; it is information people are glad to have.
Weak version:
Almost sold out!
Strong version:
3 boxes of brown butter chocolate chip cookies left for Saturday. The sticky buns sold out last night, and the sourdough is gone too.
If you have been meaning to order, this is your nudge. $18 for a box of 6, link in bio, and orders close tomorrow at 8pm.
Missed out? Next week's menu goes up Thursday morning. Turn on post notifications so you see it first.
The strong version gives the exact number left, proves demand by naming what already sold, and catches the people who missed out by telling them when the next chance comes. Post it as a story too, since stories are where last-minute buyers tend to see it.
Step 4: Set Up a Simple Order Process
You do not need a website or a Shopify store to take your first order. You need a process simple enough that you will follow it every time, even on a week when you are baking until midnight.
The simplest version. A customer DMs you with what they want and when. You reply to confirm it is available, restate the price, and agree a pickup time. They pay you through Venmo, PayPal, or a bank transfer, whichever is normal where you live. Once the money lands, you send a short confirmation ("You are booked for a 6-inch fudge cake, Saturday at 11am") and add the order to a tracker. That tracker can be a note on your phone or a basic spreadsheet with five columns: name, item, date, paid, picked up. Taking payment upfront matters, because it protects your ingredients and your Saturday from no-shows.
When the DMs get busy. Once you are juggling more than eight or ten orders a week, replying to every message by hand gets messy. A free Google Form or Typeform in your link in bio collects the item, quantity, date, and contact details in one go, and drops every order into a sheet automatically. If you offer pickup slots, a simple scheduling tool lets people book a time themselves so you are not playing calendar ping-pong. And if you outgrow both, dedicated bakery order apps can handle menus, payments, and order lists in one place.
Start with DMs and a note on your phone. Upgrade only when the simple version stops working. That moment is a good problem to have.
Step 5: Know What You Can Legally Sell From Home
Before you take your first payment, spend twenty minutes checking the rules where you live, because they vary a lot from one state to the next and from one country to another. Many places have cottage food laws that let home bakers sell certain baked goods from a home kitchen, sometimes with limits on what you can sell, how you label it, or how much you can earn, while other places have stricter rules. Search for "cottage food laws" or "home bakery regulations" plus your state or region, and check your local food safety authority or health department's website, which is the place to confirm what applies to you.
What the Difference Looks Like
The gap between a home baker Instagram that looks like a hobby and one people want to order from is almost always the photos. Same hands, same recipes, same kitchen. What changes is whether the photo makes someone reach for their phone and send you a DM.
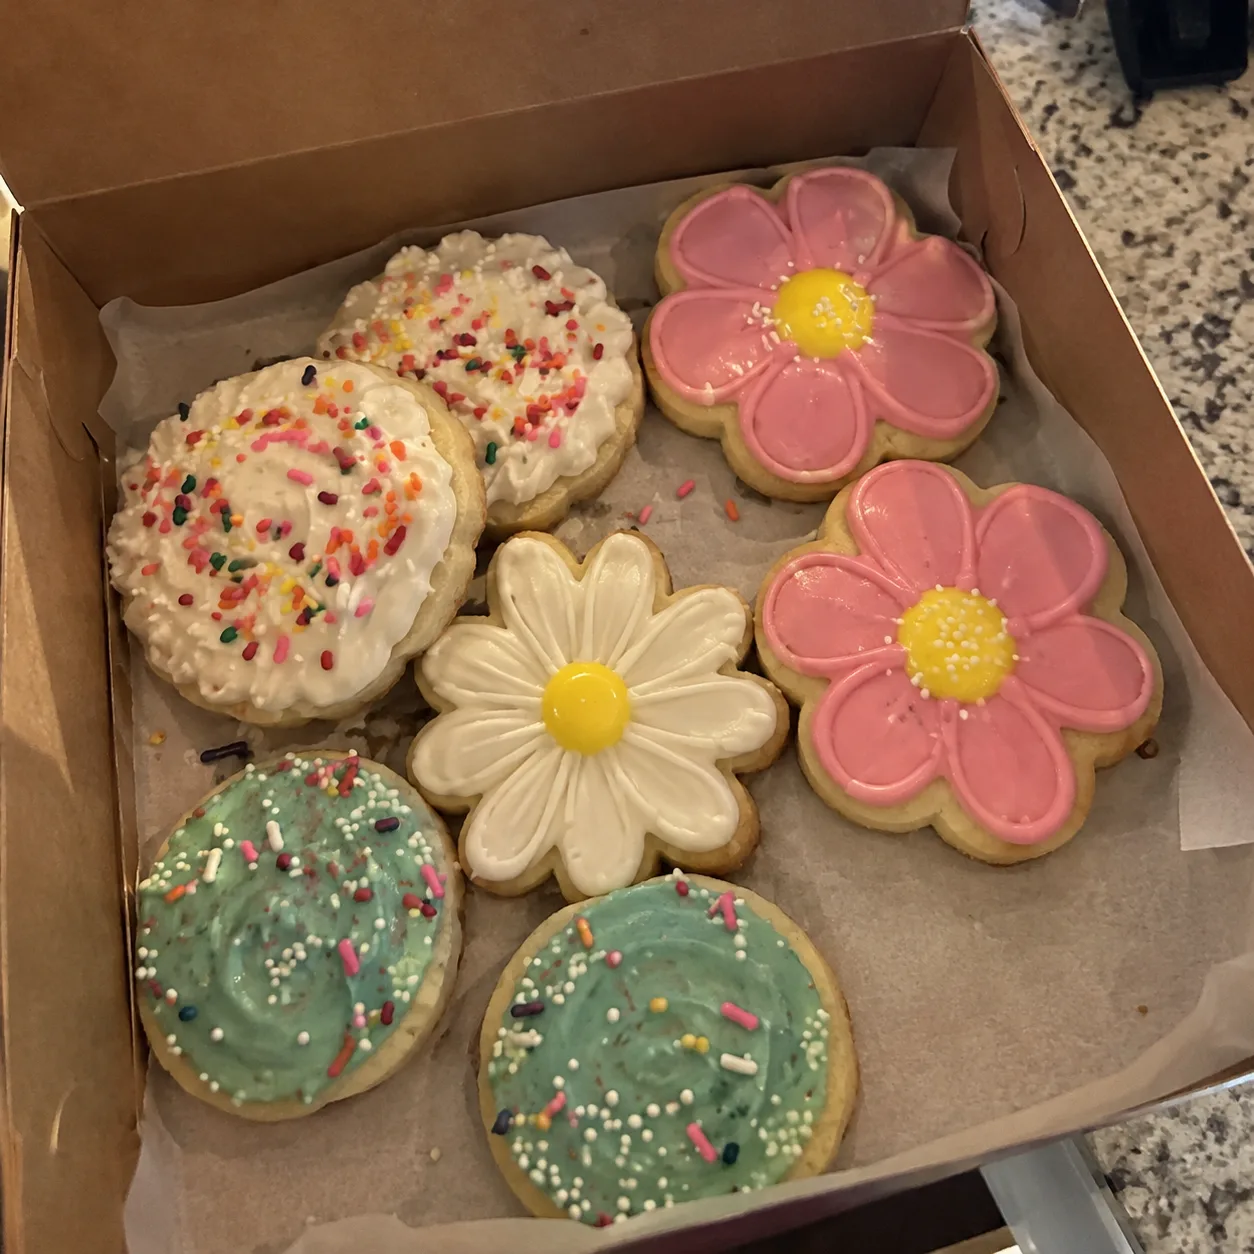
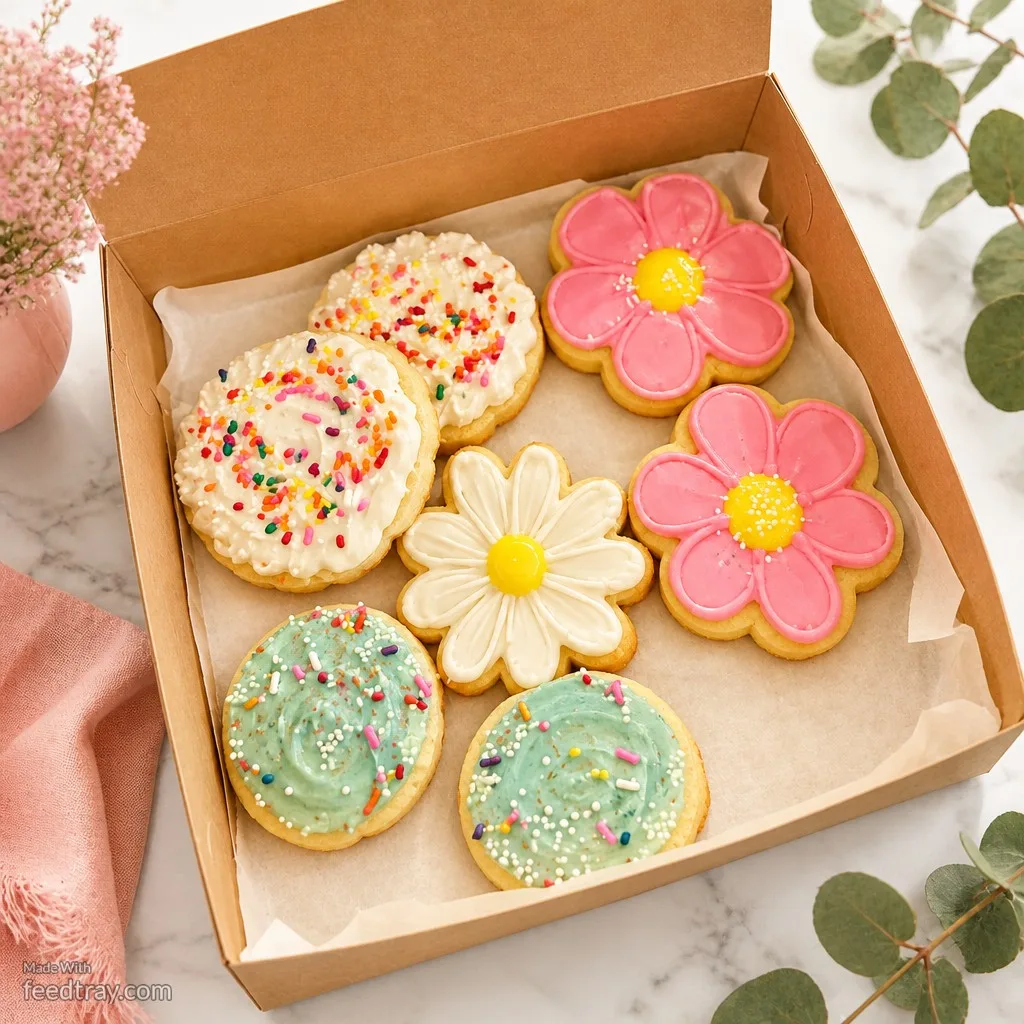
Before and after home baked goods photo enhanced with Feedtray showing how to sell baked goods on Instagram
This is the version that gets the DM.
You Do Not Need to Be Ready to Start
The most common thing standing between a home baker and her first sale is not skill or demand. It is waiting. Waiting until the profile is finished, until the photos are better, until the order process is properly figured out. Here is the secret every baker who now sells out on weekends knows: none of those things were perfect when they took their first order. Your first order will teach you more about pricing, timing, and what people actually want than a month of planning ever could. So set up your bio tonight, post one bake with a price and a way to order, and let the person who asked "do you take orders?" be your first yes.
Learning how to sell baked goods on Instagram comes down to a profile that takes orders, posts that make people hungry and tell them how to buy, a process you can follow, and photos that look as good as your baking tastes.