How to Take Better Photos of Baked Goods for Instagram

You spent three hours on that layer cake, the crumb coat, the piping, the little sugared flowers you watched four tutorials to get right, and you posted it feeling proud. Twelve likes. Meanwhile an account with baking that isn't even better than yours pulls in thousands on a photo of what looks like the same cake. That gap is not about your baking. It is almost always about how to take better photos of baked goods for Instagram, and it is fixable.
Why Baked Goods Are Actually Hard to Photograph
Here is something worth hearing: baked goods are one of the genuinely harder categories in food photography, not the easiest. Most food has color contrast built in, a red sauce against white pasta, green herbs against a seared steak. Baked goods live in a narrower range, cream, beige, golden brown, caramel. Under flat light, all of that warmth blurs into itself and the photo goes flat before you even open an editing app.
Frosting is its own problem. The swirl, the piping detail, the texture you spent so long perfecting, disappears under overhead light because there is no shadow to define it. A croissant shot straight down from above is a brown oval with no sense of the layers underneath. A layer cake shot from the side in a dim kitchen is a dark rectangle that could be anything. None of that is a skill issue. It is light and angle working against you, and once you see it that way, it stops feeling personal.
The Light Fix That Changes Everything for Baked Goods
Light is where baked goods photography lives or dies, more than any other food category. Because the color palette is so narrow, light is doing almost all the work of showing texture, depth, and detail. Overhead kitchen light flattens everything into one shadowless plane. Direct sunlight through a window does the opposite, it carves out harsh shadows that can flatten frosting texture into blown-out highlights and black pockets, which is its own kind of loss.
The fix is soft, diffused, side-facing light, and you already have access to it. Find a window that gets bright but indirect light, north-facing windows tend to be reliable for this, or any window in the hour or two before or after direct sun hits it. Set your baked good beside the window, not directly under it, so the light comes in from the side rather than straight overhead. That side light is what makes the layers in a croissant actually read, the top layer catches light while the ones underneath fall into soft shadow, giving you the depth that a top-down flash photo can never produce. On a glazed danish, that same side light is what makes the glaze look wet and glossy instead of like a flat coating. If the window light is strong enough to wash out detail, New York Film Academy's food photography guidance recommends holding a plain white napkin or sheet of paper on the far side of the food, opposite the window, as a makeshift bounce card, the same trick works well for baked goods to soften shadows on the far side of a cake or pastry without losing the definition that makes frosting and layers readable. A thin curtain or a piece of parchment paper taped over the window works as a free diffuser if the light coming in is too direct.
Getting the light right is the single highest-leverage habit for baked goods photography for Instagram, more than any prop or filter. For the fuller groundwork on food photography for bakers, including camera settings and framing basics, how to take better food photos for Instagram covers it well alongside the baked-goods-specific fixes here.
Morning light tends to be the most forgiving for baked goods specifically, it is cooler and softer than late afternoon light, which can cast an orange tint that fights with the natural gold and brown tones already in your baking. If you bake in batches, photographing near a morning window before the light shifts is worth building into your routine.
Backgrounds and Props: What Actually Works
The second biggest killer of bakery Instagram photos is the background, and the good news is you almost certainly do not need to buy anything to fix it. A busy kitchen counter with a coffee maker and a dish rack in frame competes with the food for attention. A plastic cutting board reads cheap next to something you made by hand. A plate that matches the color of your frosting, white plate under white buttercream, makes the whole photo collapse into one shade with no separation between subject and surface.
What works instead: a light wood cutting board, the kind almost every home baker already owns, gives warmth without competing with warm-toned baked goods. Marble, even a marble-look contact paper sheet or a cheese board, gives cool contrast that makes golden brown crusts and pastel frostings pop. Linen or a plain cotton napkin bunched loosely to one side adds texture without pulling focus. Parchment paper, the same paper you bake on, doubles as a backdrop that reads as intentional and on-brand for a home baker rather than staged.
The rule that ties it together: your background should be a shade lighter or darker than your baked good, never the same tone, and it should have less visual texture than the food itself. If your cupcake has a busy swirl of frosting, keep the surface underneath simple. Save the patterned napkin for a plain sugar cookie.
Once the light and the surface underneath are working for you instead of against you, the last variable left is where you're standing when you take the shot, and for baked goods that choice matters more than it does for almost any other food.
The Angle Question: Top Down or Eye Level
This is the part most photography advice skips entirely, and it is where baked goods differ most from other food categories. The right angle depends on where the visual interest actually sits on the item.
Top down, straight overhead, works when the story is on the surface. Cookies with icing detail, macarons arranged in a pattern, a flat lay of a few pastries next to a cup of coffee, these all read beautifully from above because everything worth seeing is on the flat top surface. Shoot a tray of decorated sugar cookies from above and every design is visible at once, which is exactly what sells the skill behind them.
But that same top-down angle is where a layer cake or a tall cupcake goes to die. Shoot a four-layer cake from above and you lose the entire reason it is impressive, the height, the visible layers, the frosting climbing up the side. All of that disappears into a circle. The fix is eye level or a slight downward angle, camera roughly level with the cake or just above it, so the layers stack visibly and the frosting swirl on a cupcake reads as three-dimensional instead of a flat blob. A tall cupcake with a generous swirl photographed from above looks like a muffin. The same cupcake shot at eye level, slightly angled down, shows the height of the frosting and the way it was piped, which is the actual selling point.
A useful test: if the thing you are proudest of is on the top surface, shoot from above. If it is the height, the layers, or the side profile, get down to eye level or just above it. This one decision, made before you even open the camera app, is often the difference between baked goods photos that fall flat and ones that actually show what you made.
What the Difference Actually Looks Like
You can follow every fix above exactly and still hit a wall. A phone camera in a home kitchen is working against warm indoor light, a small space to move around in, and a lens that was never built for close-up food detail. The gap between the frosting texture you can see with your own eyes and what shows up on your screen is real, and it is not something better technique alone always closes.
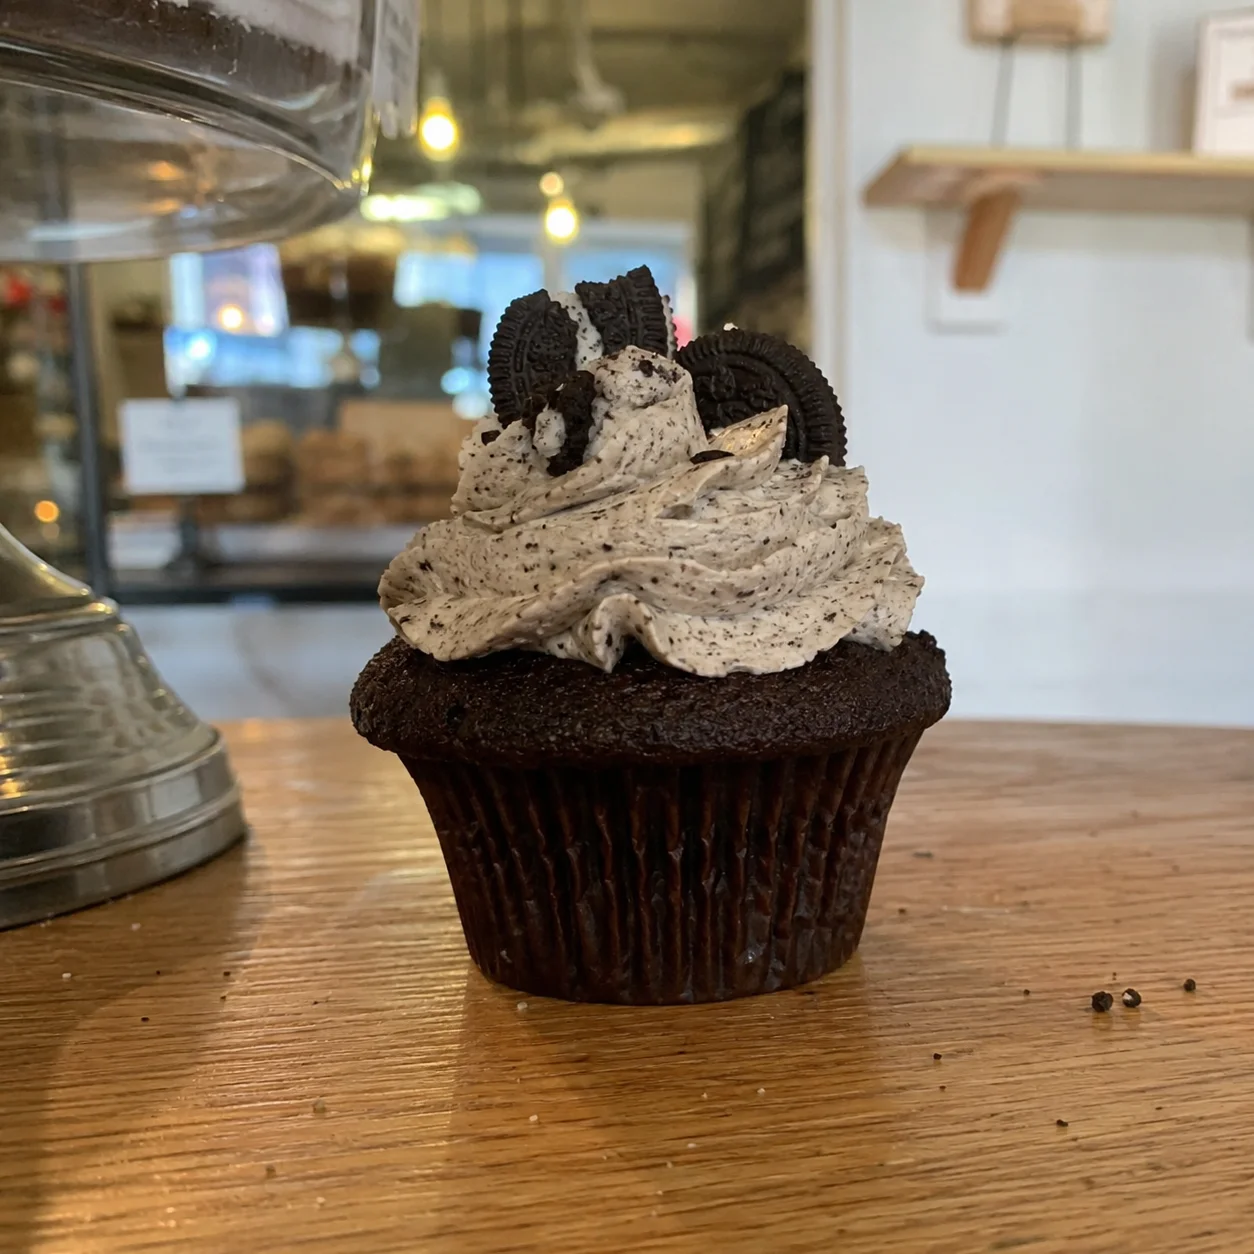
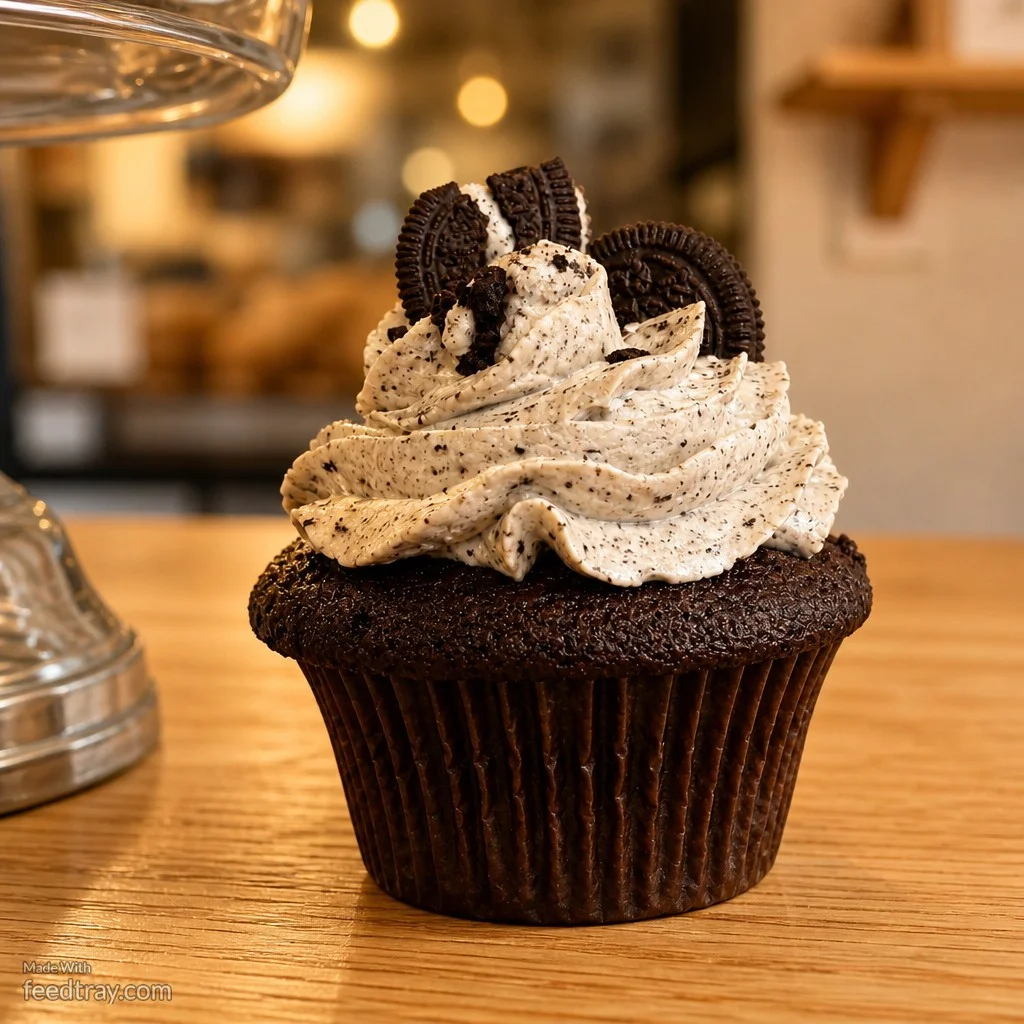
Before and after baked goods photo enhanced with Feedtray showing how to take better photos of baked goods for Instagram
That is what the baking actually looked like the whole time, and what the photo should have shown from the start.
The Fastest Way to Make Your Baked Goods Photos Look Professional
Feedtray is the tool that closes that gap without asking you to buy a ring light or learn Lightroom between bakes. You take the photo the way you normally would, window light, wood board, the angle that fits the piece, then upload it to Feedtray. In about 30 seconds, right from your phone, it corrects the lighting, cleans up the background, and brings back the frosting detail and true color that got lost in translation from kitchen to screen. It is less a photo editor and more a way of finally showing people what was already there. A lot of bakers pass it around the way you'd pass along a good flour brand, not because it's flashy, but because it quietly fixes the one thing that was holding the feed back.
The accounts you scroll through and admire are not working with better ovens or fancier ingredients than you. In almost every case, they solved the photo problem, and it took less than they expected. Once the photo is right, the caption is the next lever, and how to write Instagram captions for restaurants that actually get clicks has the framework for that.
Your baking has been ready this whole time. Your photos just needed to catch up to it.